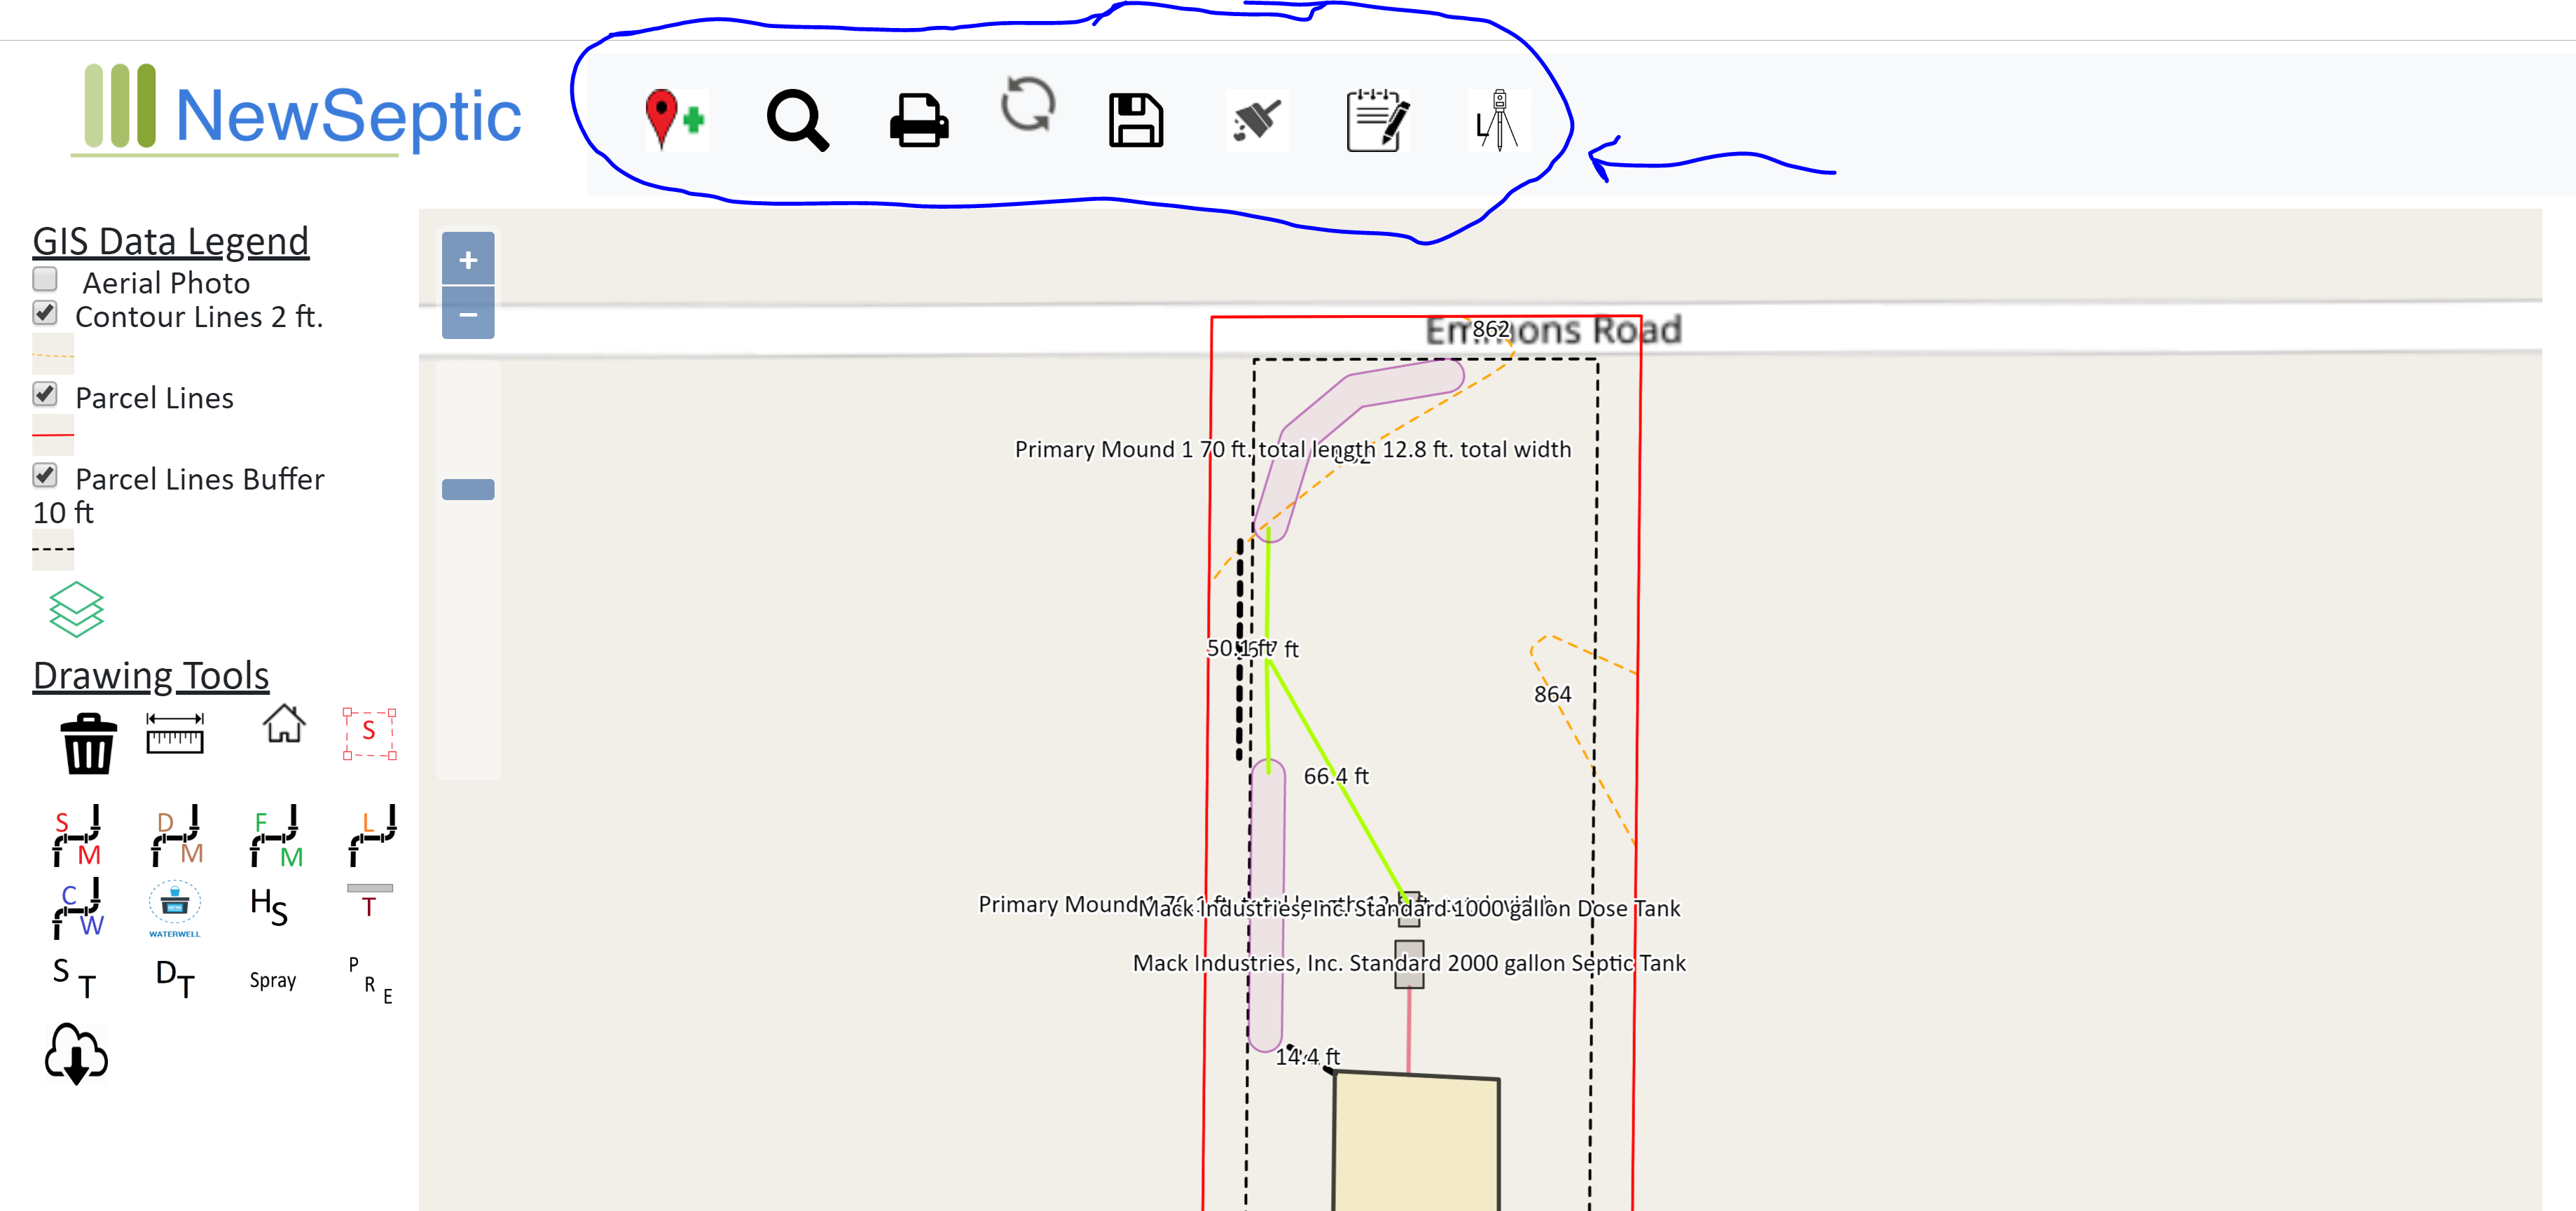
The mapping view window is where the geographic data related to your project for wastewater treatment will be loaded and presented to you. This is
where you will draw your septic system components such as sewer main, tanks, and other piping, and soil based treatment components.
Navigation
To move around the map, click down and hold inside the Mapping View Window and move your mouse in the opposite direction you want to navigate. Just like dragging the map around. Give it a try!
Zooming
On the top left side of the viewing window is a zoom level control. You can also control the zoom by holding down the control button and moving the mouse wheel forward and backward. Check out our other keyboard shortcuts
Coordinates
On the top right side of the viewing window are the coordinates displayed when moving the cursor inside the Mapping View Window.
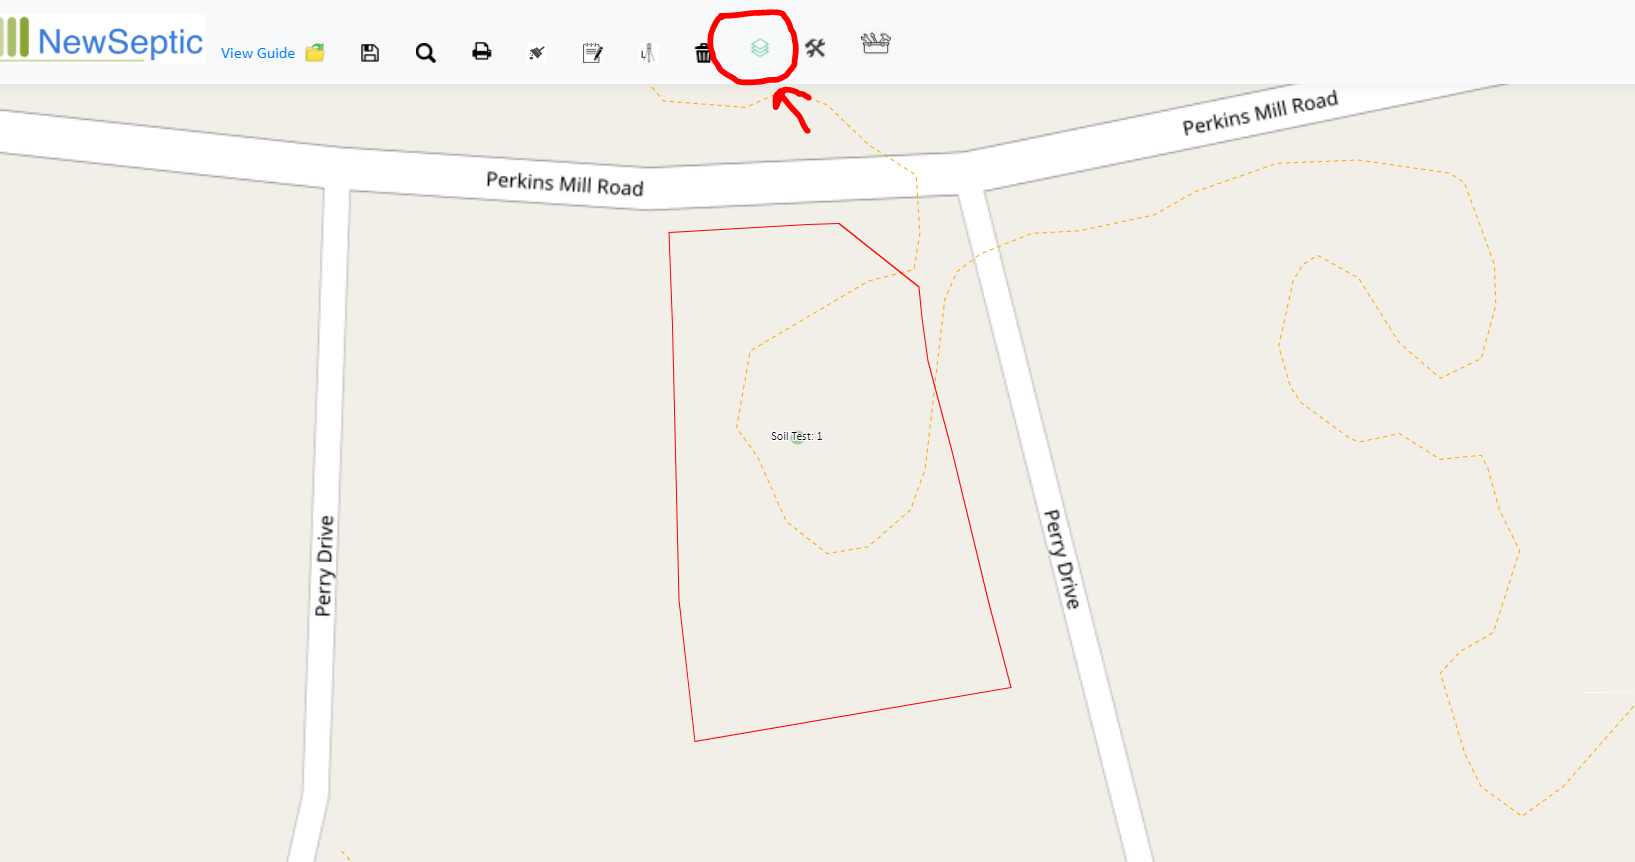
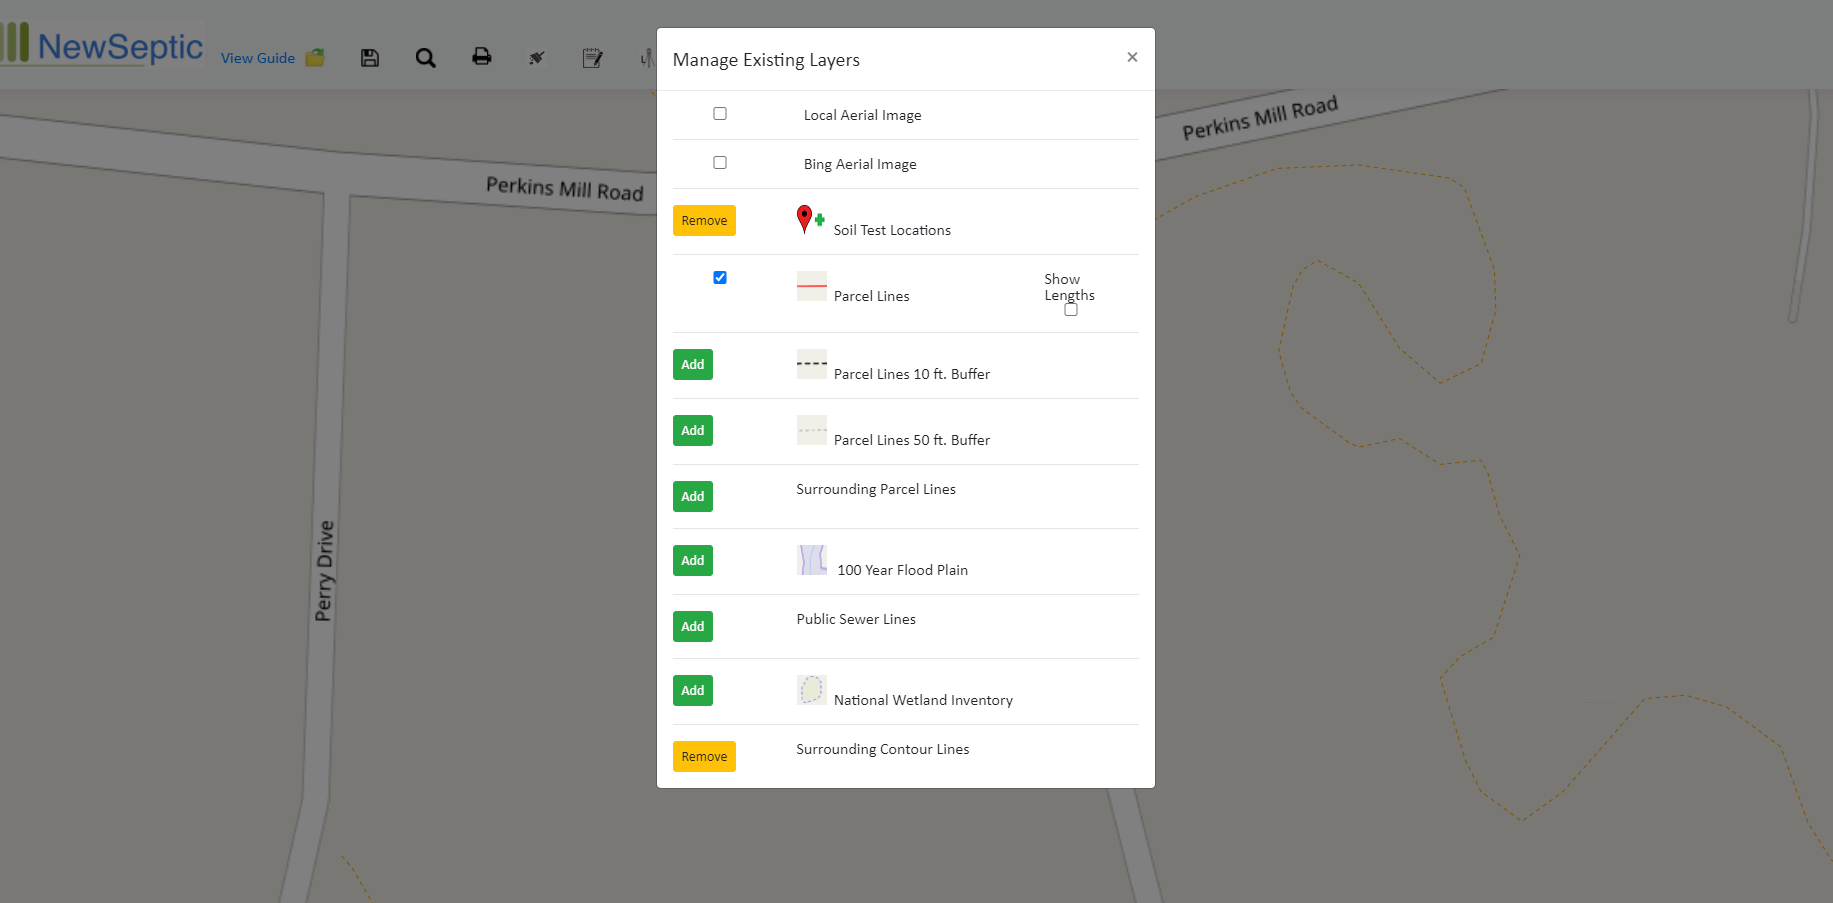
GIS Data Legend
Click on the layer button to open the Map Layers Window.
The GIS Legend is the list of geographic data sets displayed on the map. Some background datasets not list here are background parcels (neighboring parcels), background
contour lines, and 100 year flood planes. If there are data for sewer lines in your region, these are also displayed in the Map Viewing Window.
Layers that NewSeptic attempts to initially load are the property Parcel Lines, Parcel Line Buffers at 10 and 50 ft., and Contour Lines cut to the property
Aerial Photo and Base Layer
The bottom layer of the map is known as the Base Layer. This is by default a street map from OpenStreetMaps. You can select an Aerial photo as the Base Layer
by checking the Aerial Photo checkbox. NewSeptic first attempts to utilize a local image service and if unsuccessful uses a Bing map which is not visible at closer zoom levels.
Adding Layers
Layers can be added by dragging and dropping GeoJson files onto the Mapping Viewing Window. Often times new septic systems are part of new construction on newly
created lots. Surveyors submit scaled proposals of the partitioning of new parcels of land from existing ones. Sometimes NewSeptic does not have the most up to date data. It may be possible to have your surveyor
send you the geographic footprint of your new parcel of land in the form of a GeoJson file. Common mapping software can export to the GeoJson file format.
It is also possible to email us at systemseptic@gmail.com a surveyor's new parcel map scaled drawing and we can create the new parcel for you. You would just refresh NewSeptic after we successfully load
in the data and the parcel data would be there for you.
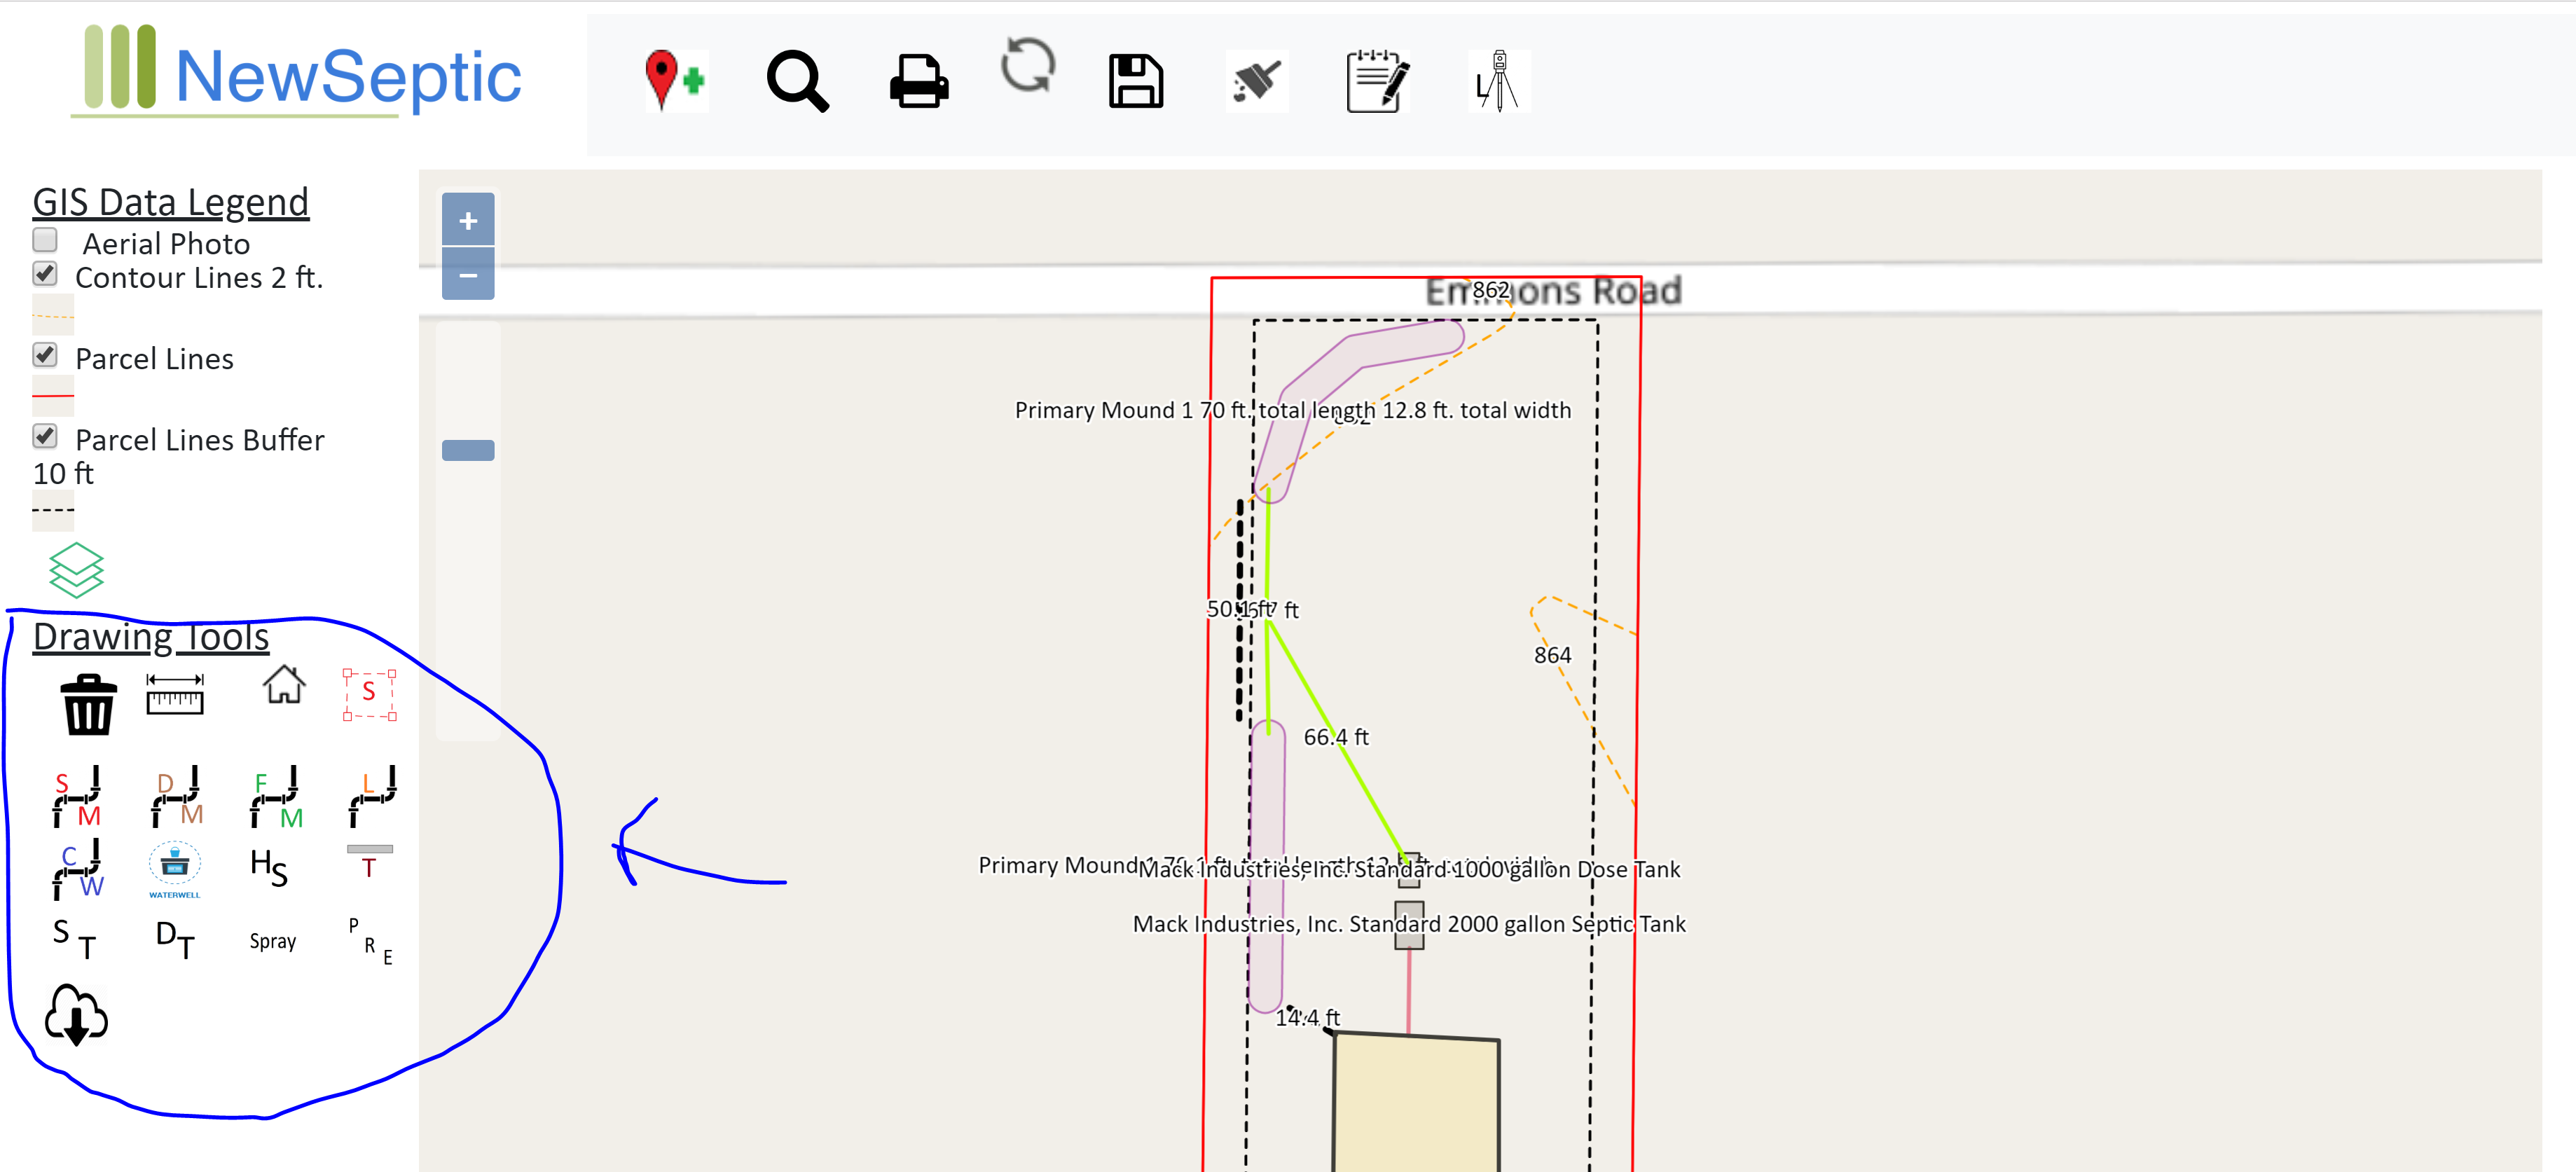
Drawing Tools
NewSeptic offers the only customized web mapping solution geared specifically towards the onsite wastewater treatment system industry. Our custom
software solution allows you to rapidly plan a sewage treatment system with real approximate dimensions.
List of Drawing Tools and their functions
Delete Button. Once a feature is selected, this button will remove the feature from the map.
Measure Tool. By clicking this button, the measure tool is selected. This will allow users to click once on the map, drag the cursor to the desired length and either click once again
to drop a vertex.
Building Polygon Tool. By clicking this button, the Building Tool is selected. This will allow users to draw a polygon representing a building on the map. Users will click once inside the Mapping
View Window and then continue to click once on the map to add corners of the building. By double clicking the user complete end the polygon and a Label Dialog Box will appear. The user can
then give the building feature a specific label. For example: 3 bedroom dwelling or garage, etc.
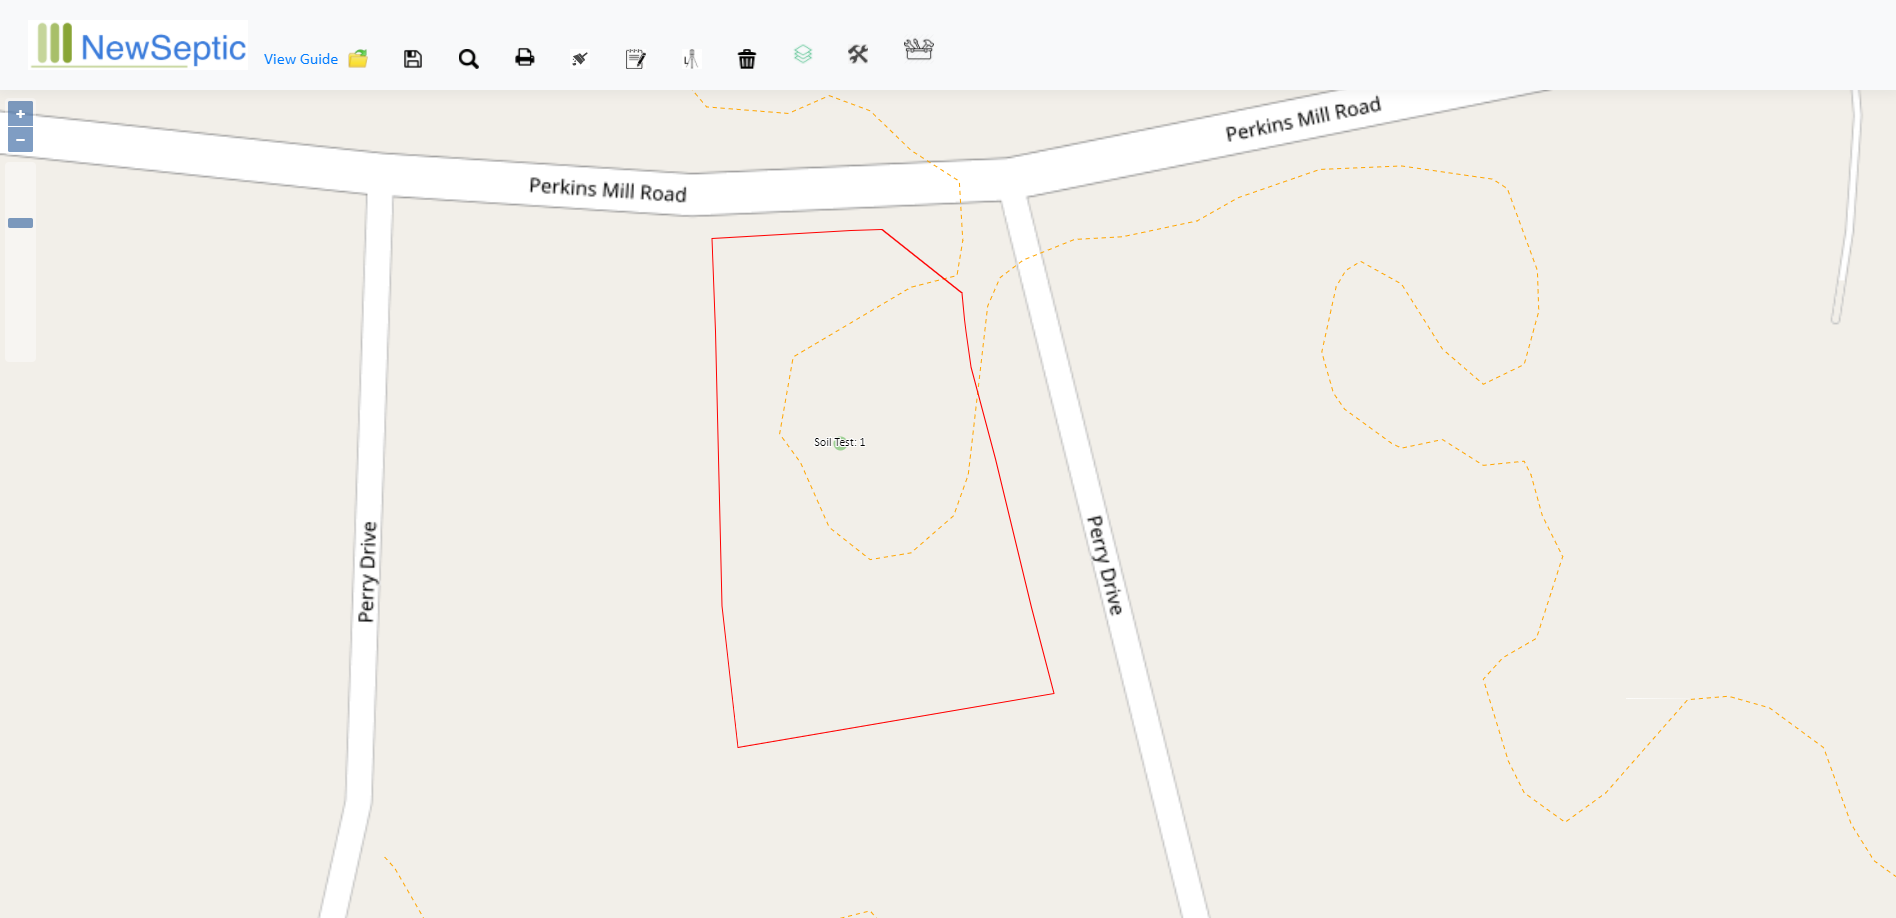
Soil Boundary Tool. The soil boundary is something some regulators require to show on the map. This represents the entire soil area tested by any soil scientist. It is a polygon drawing tool.
Sewer Main Tool. The Sewer Main tool is a Line Drawing Tool, specifically styled and labeled for identifying the sewer main and its unique features. The sewer main is a gravity wastewater drain
which starts at the house and ends at the inlet to the primary treatment tank.
NewSeptic will gather approximate elevation data during the drawing of the Sewer Main. It is important to start the Sewer Main drawing by click on the House Exit location first, then adding vertexes
or points towards the primary treatment tank.
Distribution Main Tool. The Distribution Main tool is a Line Drawing Tool, specifically styled and labeled for identifying the distribution main and its unique features. The distribution main is a gravity wastewater drain
which starts at the exit of the primary tank and ends at the inlet to the dose tank or distribution box of any soil based treatment, or discharge location if no force main is used.
Force Main Tool. The Force Main tool is a Line Drawing Tool, specifically styled and labeled for identifying the force main and its force main feature.
Lateral Tool. The Lateral tool is a Line Drawing Tool, specifically styled and labeled for identifying the Lateral and its features.
City Water Line Tool. The City Water Line tool is a Line Drawing Tool, specifically styled and labeled for identifying the city water lines.
Water Well Tool. The Water Well tool is a Point Drawing Tool. Its specifically styled and labeled to identify the water well. NewSeptic can also automatically measure and verify isolation
distances from the well to the other septic components.
Hardscape Polygon Tool. By clicking this button, the Hardscape Tool is selected. This will allow users to draw a polygon representing a hardscape on the map. Users will click once inside the Mapping
View Window and then continue to click once on the map to add corners of the building. By double clicking the user complete end the polygon and a Label Dialog Box will appear. The user can
then give the building feature a specific label. For example: driveway, patio etc.
Trench Main Tool. The Trench Main tool is a Line Drawing Tool. By completing a Trench Main Line by double clicking, additional options of the Mound Drawing Tool, Leaching Trench Drawing Tool, and Replacement System
Tools are shown on the top of the webpage, enabling the user to generate any of these components based on the completed Trench Main. The entire length of the line is assessed for elevation through our Elevation Approximation Service
Septic Tank Selector. The Septic Tank Selection tool once clicked will open a list of known septic tanks that you can select. NewSeptic will draw the Septic Tank in exact dimensions at the map center inside the Mapping View Window.
The user can then select the tank by clicking on the tank and moving the tank or rotating the map to the desired location.
NewSeptic will capture the center of the tank's elevation through our Elevation Approximation Service
Dose Tank Selector. The Dose Tank Selection tool once clicked will open a list of known dose tanks that you can select. NewSeptic will draw the Dose Tank in exact dimensions at the map center inside the Mapping View Window.
The user can then select the tank by clicking on the tank and moving the tank or rotating the map to the desired location.
NewSeptic will capture the center of the tank's elevation through our Elevation Approximation Service
Treatment Train Draw Tool. The Treatment Train draw tool allows users to click on the map and add a "Treatment Train", which is an onsite wastewater treatment industry term for the
selected series and order of the tanks installed for an onsite wastwater treatment application. Through the treatment train tool, NewSeptic allows you to build and save your treatment
trains. NewSeptic will then draw the tank components on the map using their dimensions. The primary tank is always drawn to the North.
For a quick tutorial, see the YouTube video below:
Spray Zone Generator. The Spray Zone tool once clicked will open a list of known spray head nozzles that you can select. NewSeptic computes the required arc total for the selected spray nozzle radius and the required square footage based on
the daily design flow.
NewSeptic will capture the spray head's at grade elevation through our Elevation Approximation Service
Pretreatment System Selector. The Pretreatment System Selection tool once clicked will open a list of known pretreatment tanks that you can select. NewSeptic will draw the required Pretreatment System Tanks in exact dimensions at the map center inside the Mapping View Window.
The user can then select the tank by clicking on the tank and moving the tank or rotating the map to the desired location.
NewSeptic will capture the center of the tank's elevation through our Elevation Approximation Service
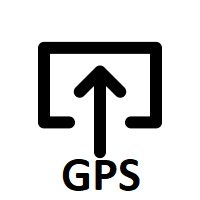
Point Export Selector. This button presents the user capabilities to select features and export the points to a CSV (comma separated value) file. This file can be imported into a GPS device
to stake out any components on a property.
Options Analysis. This button presents the user with intelligent analysis of any soil test reports, local regulations regarding vertical seperation distance and
required in-situ soil, to provide a list of system options with basic dimensions for drawing on the map.
Benchmark Point. This button will allow you to place a benchmark location on the map.
Import GPS Points. NewSeptic will read a csv (comma separated value) file for field collected gps data. NewSeptic will then draw certain components on the map based off the GPS.
The csv file should be set up with the point name as the first entry, next latitude, then longitude. NewSeptic will read the csv file in that order.
Click to Add Contour. This button will allow to click on the map and have NewSeptic fetch the contour grid for that location/point on the map. Sometimes
the map is loaded and a parcel is found, but NewSeptic loads only one contour grid. Maybe NewSeptic will fetch all the required contours in the future, but for now,
use this tool to load your contours. Below is a short video on how this works in NewSeptic:
Click to Draw a Parcel. This button will allow to click on the map and draw out a parcel. Add a new vertex by click on the map, delete a vertex by clicking the the delete button. Double-click to finish
the drawing. You can click on the drawn finished parcel and move or add vertices. You can right-click to "Commit Parcel", which allows NewSeptic to treat the parcel as it does a found Parcel in NewSeptic's
database, drawing buffers and labeling in the legend. Below is a short YouTube video on how to use the Parcel Draw tool:
Click to Measure Slope. This tool will allow you to click two points on the map, click once to start, then double click to finish. NewSeptic will measure the slope percent along this line using
a digital elevation model. NewSeptic leaves this slope line on the map and labels it with the slope percent. Some counties like to see the slope on their map.
Data Management Tools
The Data Management Tools allow the users to edit GIS data and clear features.
Add Soil Test Tool. The Add Soil Test button will allow users to add a soil test locations to the map. If users have already added soil tests into the other soil entry forms, but there were no
accurate GPS points, you can update them by clicking this tool, clicking the location on the Mapping View Window, then adding the test hole number that is the same as the desired soil test.
Search Parcel Tool. The Search Parcel tool allows users to search for another Parcel Id
Print View. This button will save the current features and take the user to the print view, where the user can edit labels, format the map, and generate a pdf copy of the map
Reload All GIS Features. This button will clear all the GIS features from the map and attempt to reload all the GIS datasets.
Save Features. This button will save all queried GIS data, any drawn components, and any Field Measurements or Elevation Measurements entered.
Clear Drawn Features. This button will clear drawn features on the map. You can continually click this button until all features are cleared.
Enter Field Measurements. This will open a form which allows users to edit some field measurements of some select drawn features. For example, a field measurement of 110 ft. for the force main
as opposed to the drawn measurement of 107 ft. The field measurement can be taken as more accurate and can be added on this form after drawing the feature.
Enter Elevation Field Measurements. This will open a form which allows users to edit some field elevation measurements of some select drawn features.
Keyboard Shortcuts
Control + Mousewheel
Allows zoom in and out. Caution with this that sometimes if there are many data heavy layers loaded on the map, this can be slow, especially with slower
internet connections.
Control + s
Saves your work. Same as hitting the (Save Icon)
Delete
If a feature is selected, it will be deleted. Same as hitting the (Delete Icon)